 |
| The dendro like object is made from illustration boards, I applied what I have learned from our epic teacher MR. Romero xD which is considered to be a per....fect example for a teacher ahahahaha!! XD other parts are from scratch too like straws folders pvc pipes found lying on the street(I dont mind picking up stuff in the streets as long as it looks useful and is not filthy) and lastly made out of cans |
Tuesday, March 27, 2012
Intervention Gundam
This was my entry for the Pinoy GB at zerogunz hosted by Don Carlo Suratos A.K.A. DC23 I was not supposed to win but Kisapmata gave me the prize because of my effort T________T I'm Still touched of his generosity thanks to them I now have the MS Igloo Zaku which I also treasure hehe. here it is
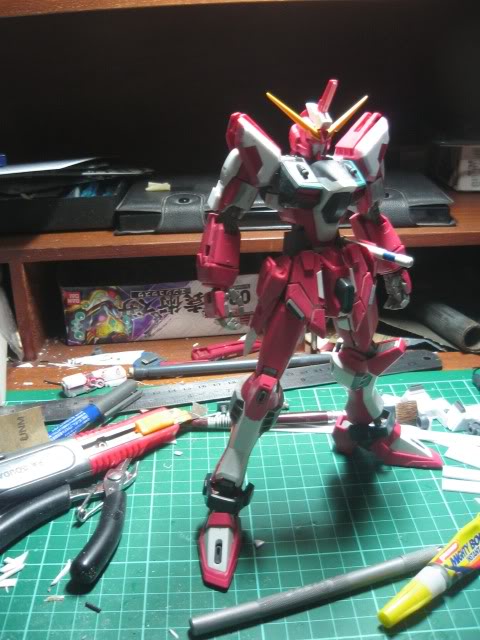
ASTRAY FLAME FRAME 1/100 NG
This is my entry for 2009 BAKUC and luckily won a consolation prize which is the G30th anniversary 1/144 RX-78-2 Gundam. This is my favourite since this is by far the longest build I have done while I was still learning hehe still no use of primers back then thats why there were uneven yellow paints. but I like it very much and first time trying water decals which did'nt go well as it has a flat finish thats why the decal wont stick into it and I have no idea what was a top coat back then.
 |
| I was still developing photography skills back then hehe lacks lighting and appropriate backgound :D but its part of learning. |
RX-178 GUNDAM MKII
This is my 2nd modified gunpla since I started only did kitbashing and no primers, sanding or whatsoever was done because this was just the start of my gunpla career (really career? haha)
 |
| Gundam MKII master grade version 1 hehe did not care what version it was back then as long as I like it Id hope for the best to get it and I was not fond of pla plating yet. so yeap thats pretty much it, was a Christmas gift from my parents and up to now its still standing :D because like I said I treasure it since it came from my parents. |
Monday, March 26, 2012
Infinity Justice Gundam Part II
Here is the second part of my W.I.P. I just prepped the parts at the back witch will be a lot more detailed on later on, it would be best to make the simplest and important things first rather than already detailing the parts unevenly so here goes
Thats all till next update :)
 |
| Assembly part by part composed of tamiya pla plates, baloon sticks for the tube like parts I should try the real modelling tubes because they simply have different sizes and the blue and green colored tubes are from flashlights. |
 |
| From top left the swords are attached into the holsters of the main backpack and at the top right is the detached ones which slides, I know it will loosen overtime but some quickfix will deal with it which is still in its early stages detailing up and bulk will add on soon and the backpack extension so that it would be a trouble if I would be attaching the fatum at the back, and will synchronize when both parts are connected which is a 4 point articulation so far the most points I have made in all of my modelling years hehe |
 |
| when finally connected took me whole day to make the joints but it was worth it as it was clean this is how it would look like attached at the back so when the fatum detaches ij has wings/blades |
Thats all till next update :)
Tuesday, March 20, 2012
Genoace Midyear entry :)
This is my Genoace the prize I got from last GBWC haha at first I really dislike it since its quite new to my eyes (the design) until I watched Gundam age haha kinda changed perception after it, I now like the designs :) besides from the articulation is awesome in my opinion! It can pose better than old Master Grades and there are barely any visible seamlines but a clean build is my objective as that is the rules for midyear! :) Good luck to everyone participating.


I have only done the left and right shoulders while sealing of the seams of other parts hehe Ill priming them by tomorrow I will give it a nice finish hopefully! :)
Monday, March 19, 2012
Sazabi Internal modification
This is one of the initial modifications for my Sazabi, as you can see I started out by adding beams for later on to support the main blocks. The blocks are made out of clear parts from Destiny Gundam MG, and the internal parts inside the blocks are the rubber parts from Zoid kits I have.
 |
| I dont know much yet of structural integrity but I want to make sure that the reinforcement I made for this is enough when I attach the pegs from the arms. Luckily the results are fine and withstand some quite amount of force applied to it. |
 |
| For the easier part I just glued small pegs inside. Then added balloon sticks which will fit the above parts. |
 |
| The recent look of my Sazabi. I removed the problem of the arms popping off and here it is. |
Thats all for now I plan to do the feet next, as it cannot stand properly. Will try my best to do it soon! thank you for dropping by!
Sunday, March 18, 2012
Infinity Justice Part I
I present to you another work in progress this is my entry at 2012 MECHA CONTEST AT MAC that has been running since the beginning of the year. I only have the time to blog about this build since I don't have time because of studies. But now I am celebrating the term break, to catch up on stuff I will give more time doing my wip. anyway here is a summary of pics of my build :) the complete wip is in the forums :D
here is the link of my thread: http://boards.themacforums.com/topic/7542304/1/


here is the link of my thread: http://boards.themacforums.com/topic/7542304/1/

 |
| KOTOBUKIYA MSG given to me by Masayuki Yuda |


Sunday, March 4, 2012
Zeta plus Restoration
Hello again guys long time no update from my blog I had problems with my old pc but now I use a new laptop and able to update again anyway here is a zeta plus given to me by Topetsuki Maling or topetsuki93 at the MAC forums. He gave this to me with no other reason but to return the favor for some stuff I cant remeber XD
anyway he sure is a nice guy and also gave a NG freedom along with it. I chose to do this first as it needed less repairs :) so here it is I have only cleaned some parts but already took photos so you guys could see how much cleaning was needed.


I dont plan to modify it. I just want to do modelling basics here :) and give it nicer paint job anyway thats all thank you for viewing
Subscribe to:
Posts (Atom)